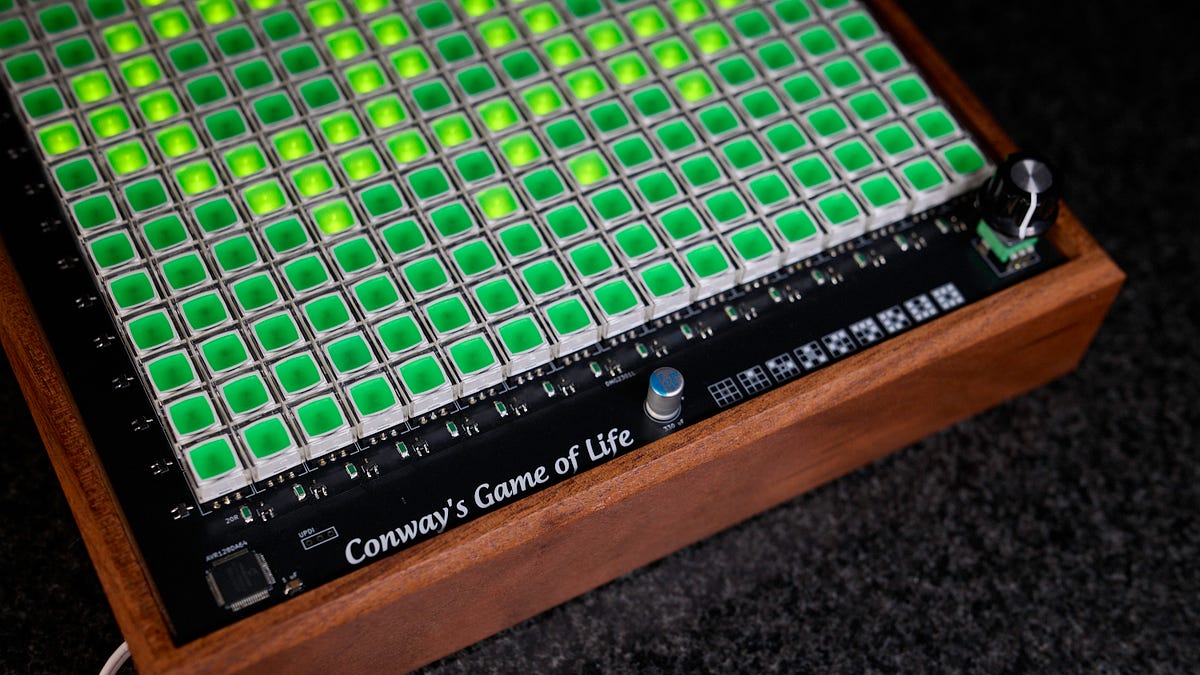
 Conway's Game of Life, in real life - lcamtuf’s thing
https://lcamtuf.substack.com/p/conways-game-of-life-in-real-life?utm_source=clivethompson&utm_medium=email&utm_campaign=linkfest-44-microchimerism-sonic-boom-duct-tape
When life gives you switches... (Conway's game of life on a big grid of illuminated momentary switches)
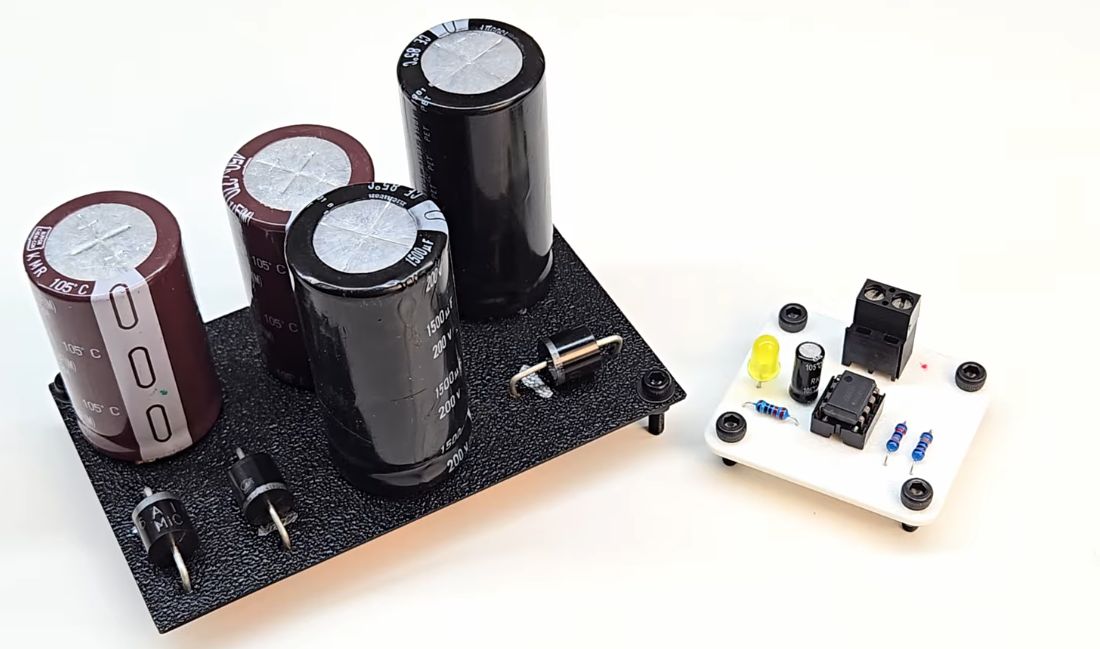
 Using 3D Printing And Copper Tape To Make PCBs | Hackaday
https://hackaday.com/2026/01/28/using-3d-printing-and-copper-tape-to-make-pcbs/
In a recent video [QWZ Labs] demonstrates an interesting technique to use 3D printing to make creating custom PCBs rather straightforward even if all you have is a 3D printer and a roll of copper tape.
 DOOMBUDS
https://doombuds.com/
You know the 1993 classic DOOM? I made it run on an earbud, then I connected it to the internet and made it possible for visitors like you to sit in a queue for hours play the game remotely!.

 Datacenters in space are a terrible, horrible, no good idea.
https://taranis.ie/datacenters-in-space-are-a-terrible-horrible-no-good-idea/
The short version: this is an absolutely terrible idea, and really makes zero sense whatsoever. There are multiple reasons for this, but they all amount to saying that the kind of electronics needed to make a datacenter work, particularly a datacenter deploying AI capacity in the form of GPUs and TPUs, is exactly the opposite of what works in space. If you've not worked specifically in this area before, I'll caution against making gut assumptions, because the reality of making space hardware actually function in space is not necessarily intuitively obvious.

 Ladytron - Kingdom Undersea (Official Video) - YouTube
https://www.youtube.com/watch?v=U1r3d7wR9is
Director: Daniel Hunt and studio//w-m//
Cinematography: George Haydock
Video Installation: studio//w-m//
Installation build: Paul Sullivan
Running Minecraft on a lightbulb
https://hackaday.com/2025/11/13/running-a-minecraft-server-on-a-wifi-light-bulb/
WiFi-enabled ‘smart’ light bulbs are everywhere these days, and each one of them has a microcontroller inside that’s capable enough to run all sorts of interesting software. For example, [vimpo] decided to get one running a minimal Minecraft server
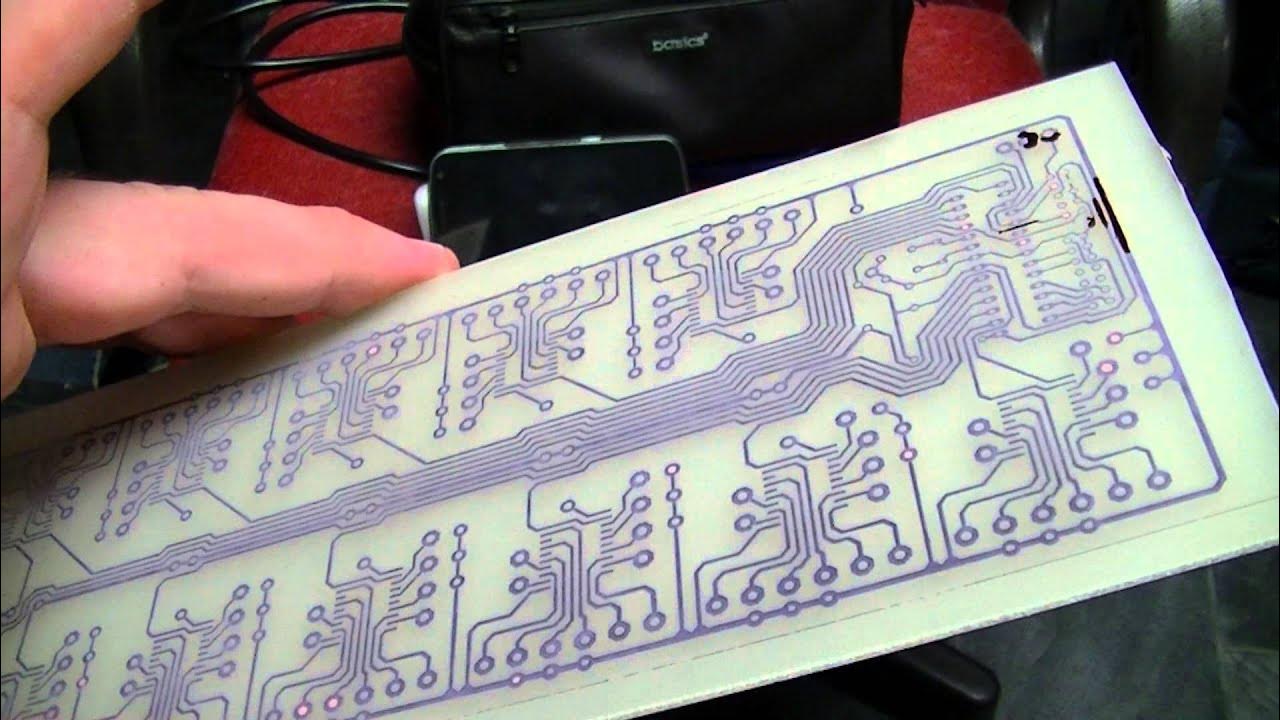
[retro swim] - Episode 18 - RGB SCART AV Switch - YouTube
https://www.youtube.com/watch?v=AH5M4Xj5-RY
A look at the construction and operation of my RGB AV switcher. (expand to see all the links!)
 8-input Video Switch
https://www.vwlowen.co.uk/radio/videoswitch2/index.htm
Instead of switching just four inputs, the new unit can switch 8 AV (composite) cameras and uses readily available transistors to do the switching in place of the potentially unreliable electro-mechanical relays. As a bonus, it is, of course, totally silent in use.
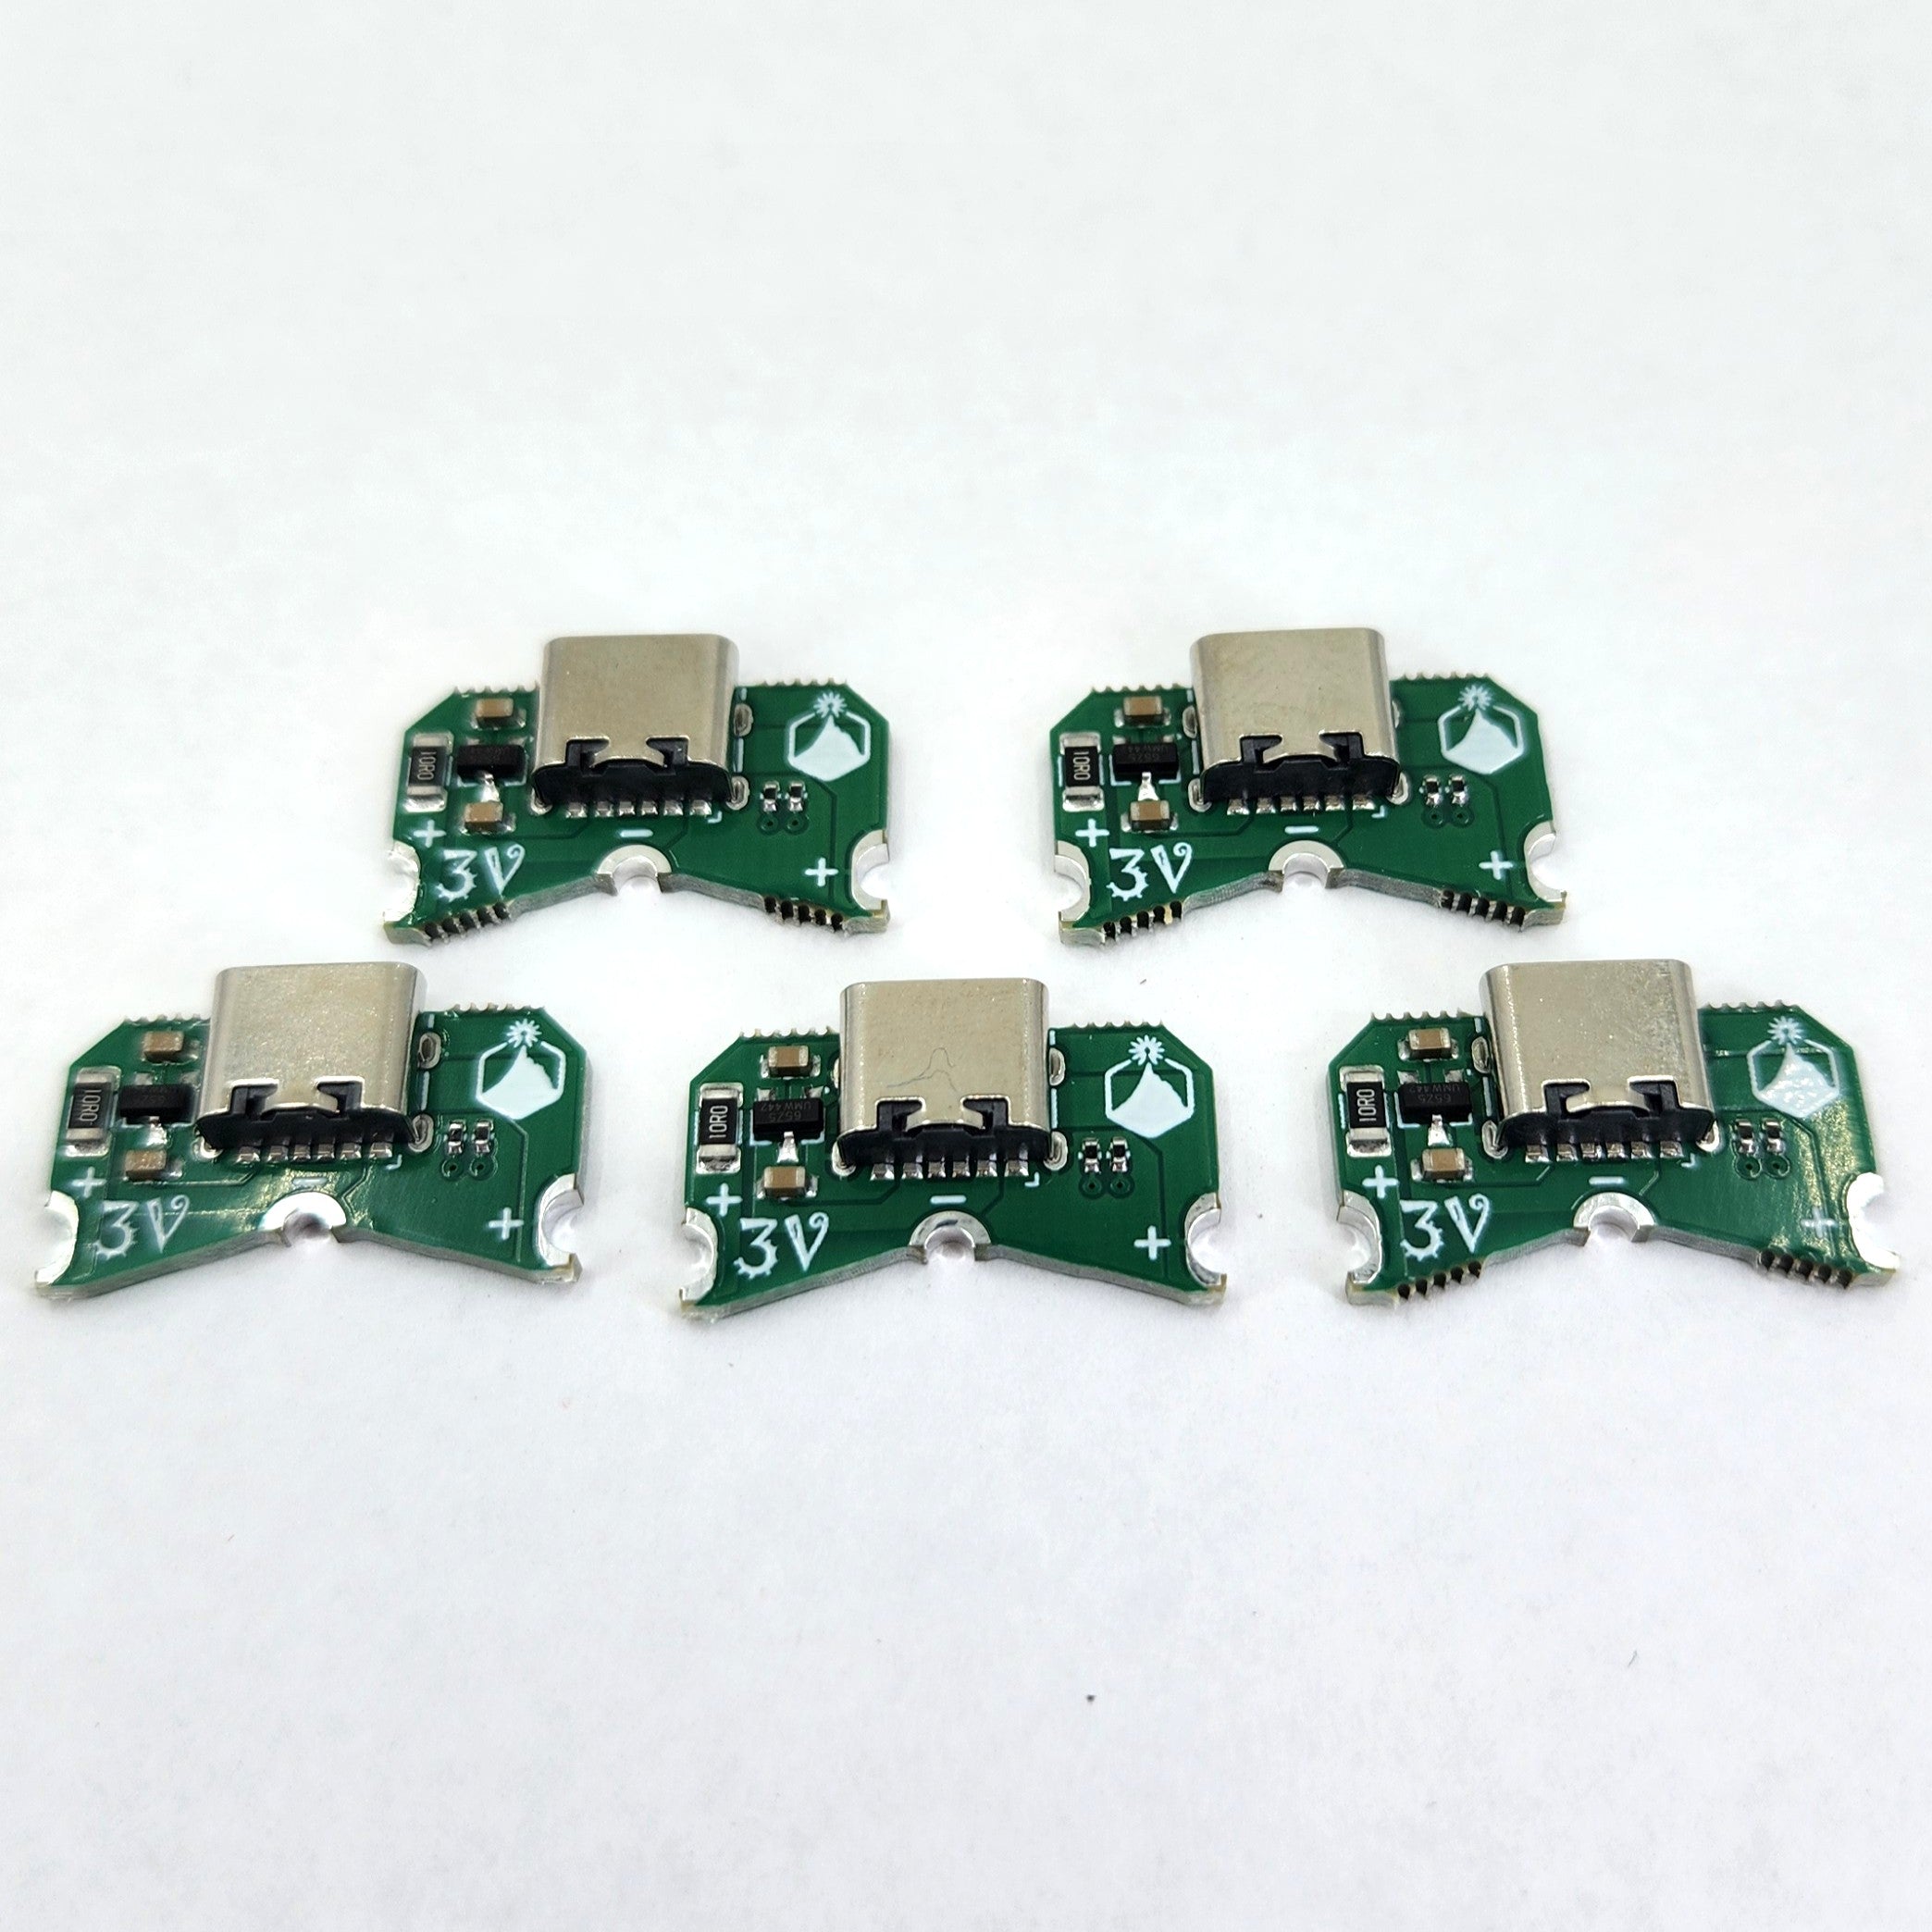
 Coin Cell Be Gone
https://www.alpenglowindustries.com/products/coin-cell-be-gone-5-pack
Got soldering kits that take side-insert CR2032 holders? Want to get rid of that coin cell holder and convert it to USB? The Coin Cell Be Gone does exactly this! Solder it directly to either a through-hole or surface mount side-insert footprint at the 3 castellations
The SwitchTrick
https://www.alpenglowindustries.com/products/the-switchtrick
A super handy switching power supply (buck/drop-down) for solderless breadboards, with jumper-configurable output voltage.
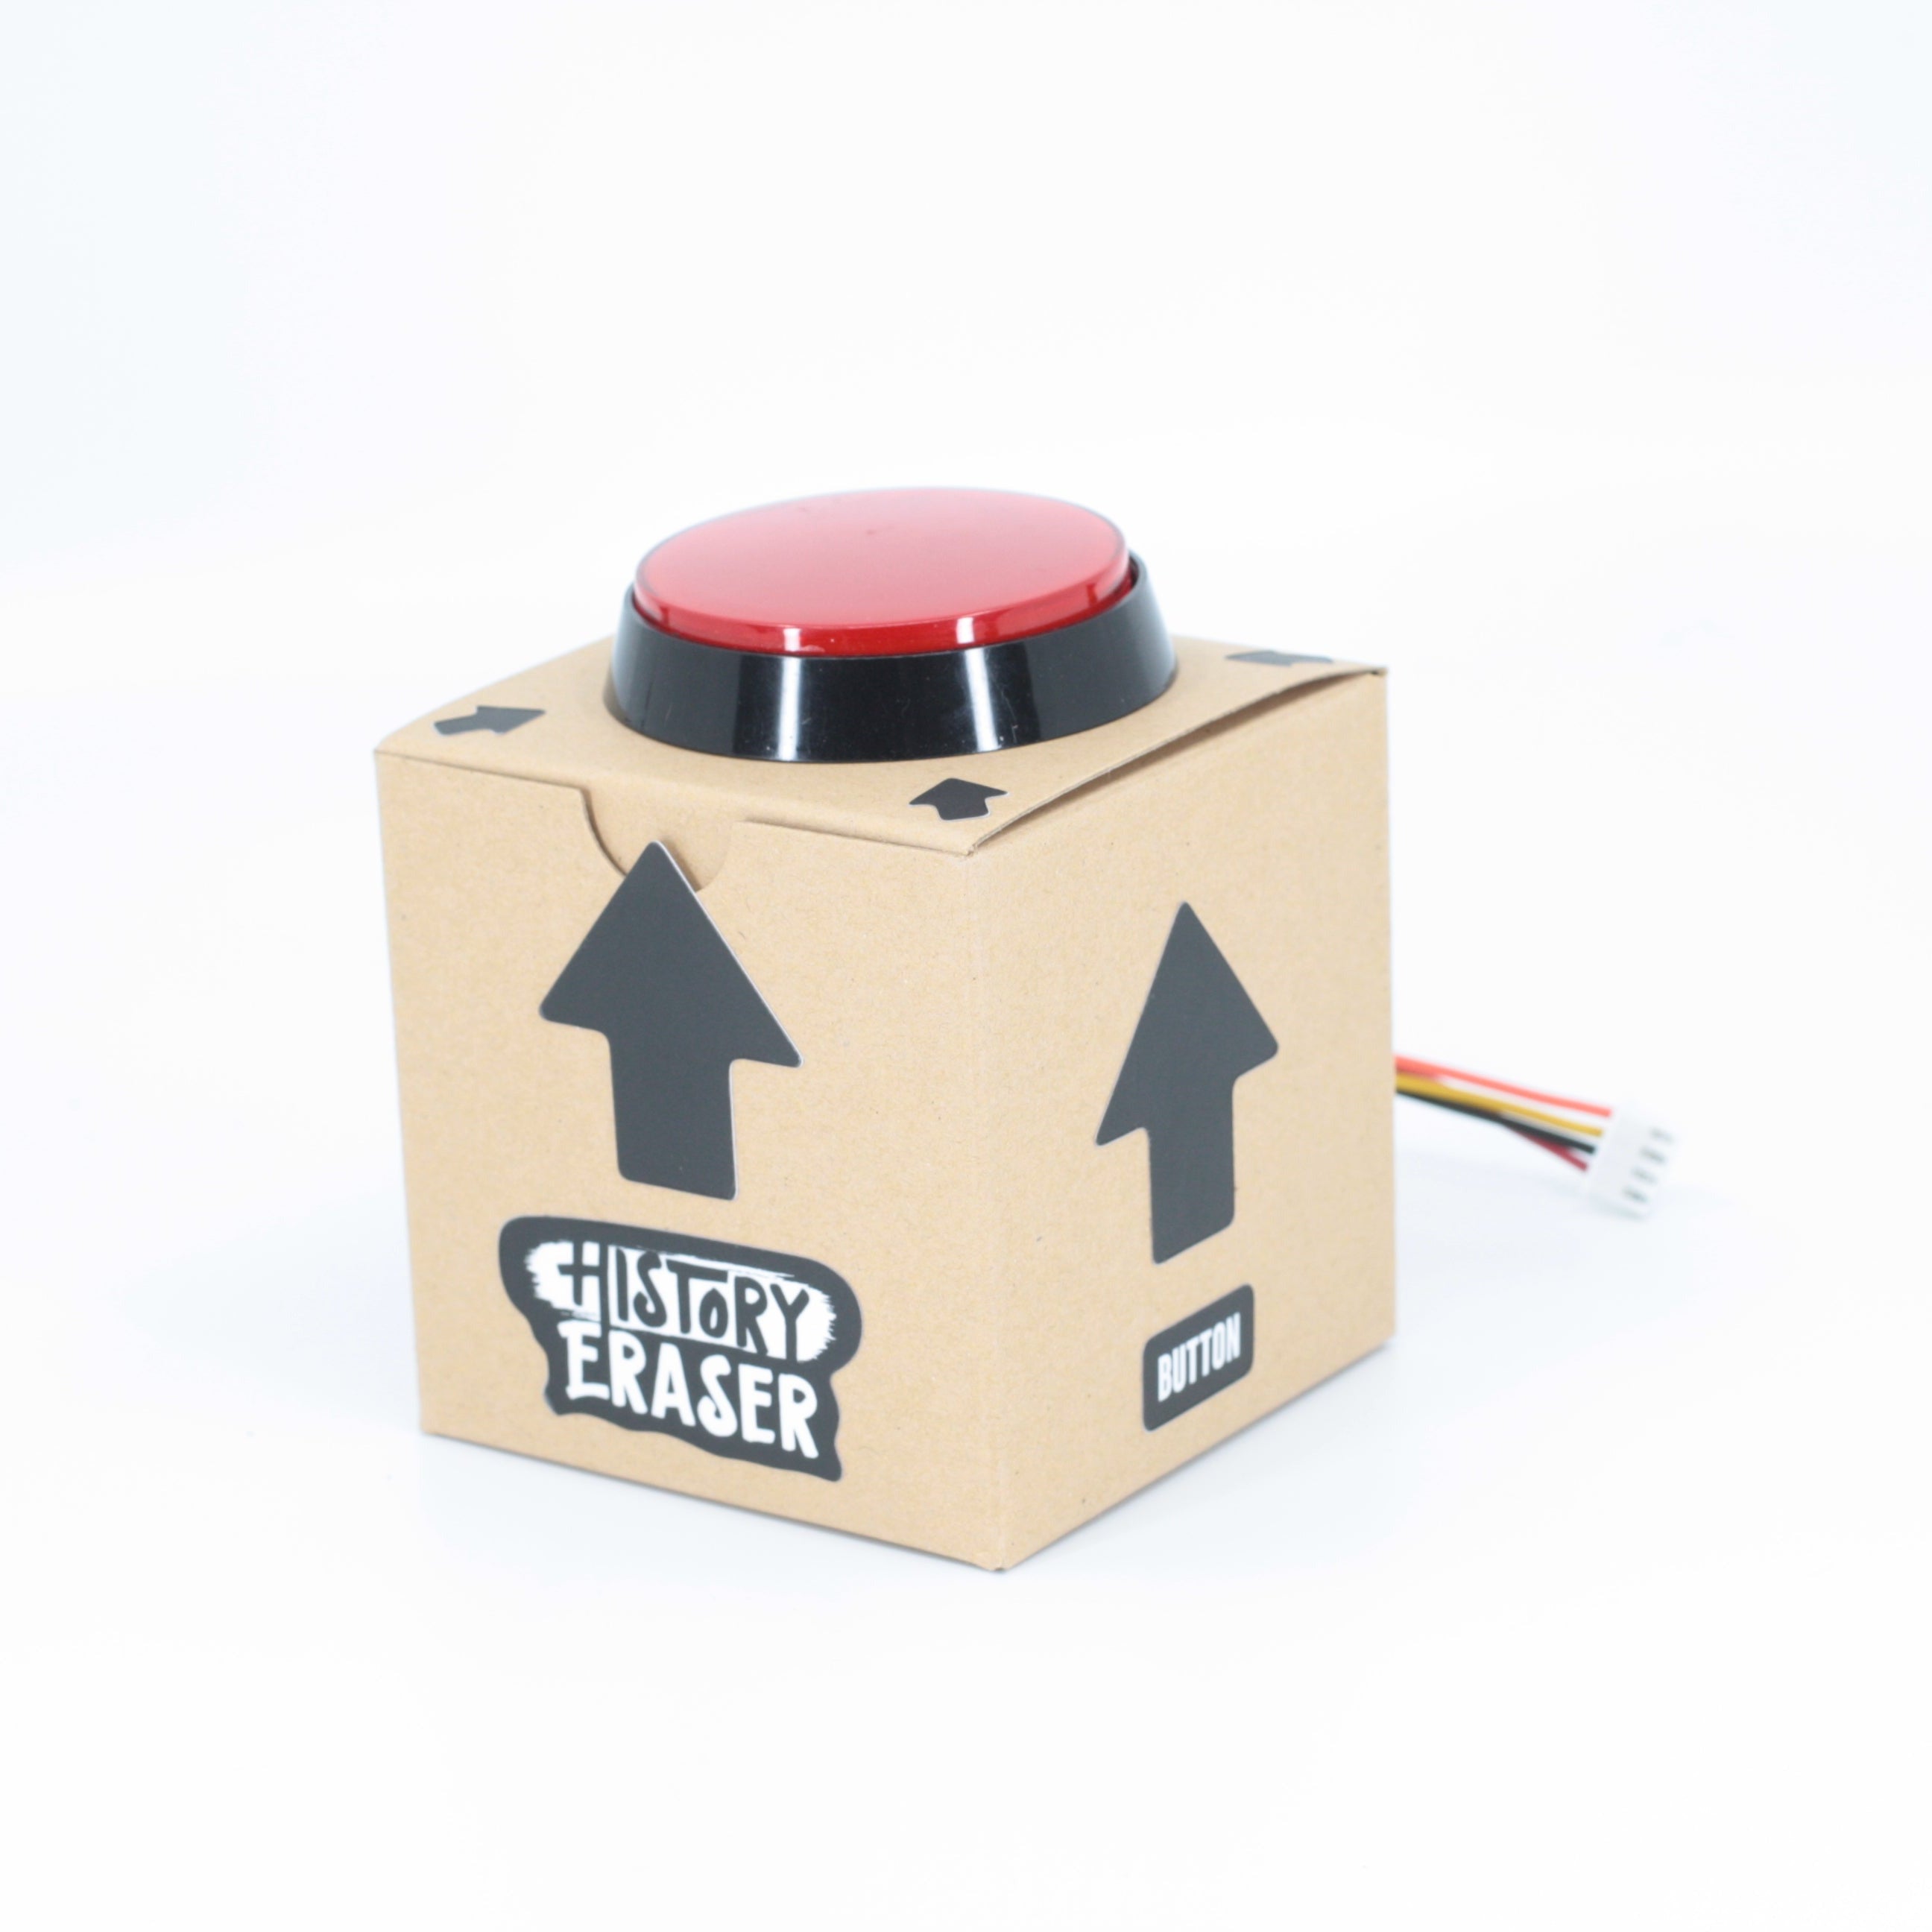
Big Red Arcade Button Kit
https://www.alpenglowindustries.com/products/big-red-arcade-button-kit
Add a Big Red Button to any project with this handy kit! Includes 60mm arcade button with LED, box, cable, and stickers.
It Goes Both Ways! Lithium Battery Charge-Boost Kit
https://www.alpenglowindustries.com/products/it-goes-both-ways-lipo-charge-boost-kit
Make your own power bank out of any (1000 mAh or over) lithium battery!
Are you a fan of bi-directional USB-C? Hey, so are we! This awesome little board goes both ways - the USB-C connector is both an input to charge a lithium battery at 1.0-1.2A and an output that provides a boosted 5V from the battery at 1.2A!
 Giant USB Button – RasterWeb!
https://rasterweb.net/raster/2025/01/29/giant-usb-button/
Look, I’m just going to come out and say it… this Giant USB Button is probably too big! It’s 228.6mm x 228.6mm x 120mm (which is 9″x9″ x 4.725″). The thing is, when someone asks me to build something for them, and it seems interesting, I can’t really say no. And I did say “no” this time, but mainly due to the tight deadline. I said I would need about twice as much time as requested and luckily the client came back with “We can do that!” So I got to work…
 Building a Frankenstein 64 - Celso Martinho
https://celso.io/posts/2022/12/28/c64-from-scratch/
Last year, I decided that I was going to build a Commodore 64 from scratch. This is the blog documenting the project.
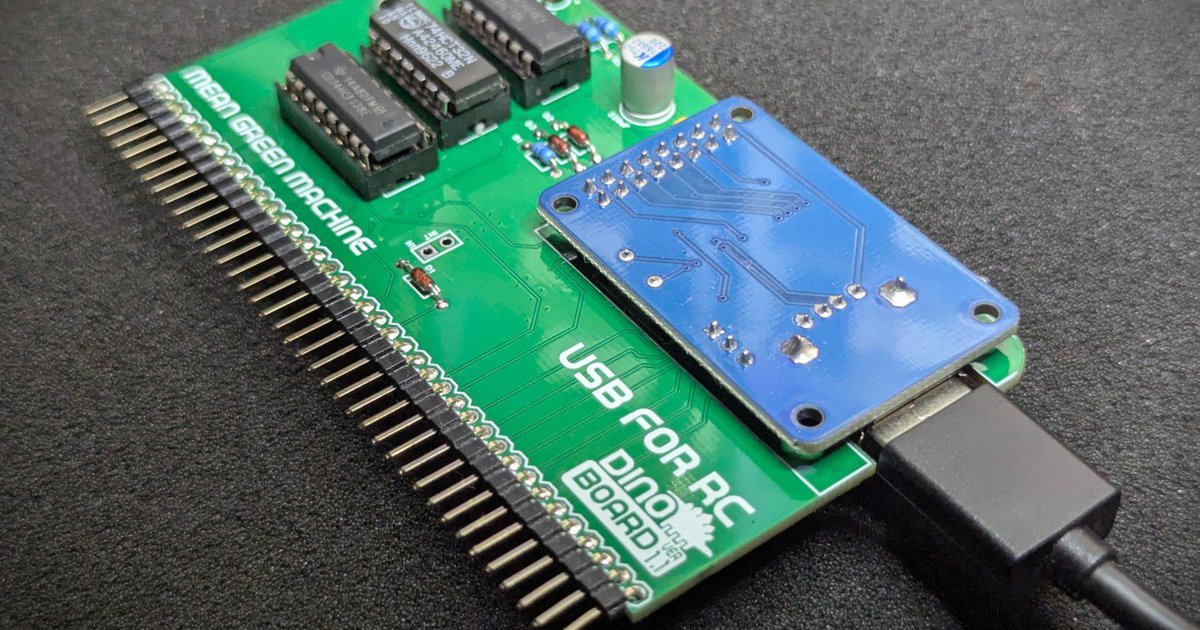
 USB for RC from Dino Boards on Tindie
https://www.tindie.com/products/dinotron/usb-for-rc/
Bring your RCBus/RC2014 build into the 90's with true native support for Universal Serial Bus.
 How to Make a 555 Synthesizer Circuit (The Atari Punk Console) | PCB | Maker Pro
https://maker.pro/pcb/projects/diy-555-synthesizer-circuit-aka-atari-punk-console
Create a funky synth that is based on a popular circuit called a stepped oscillator (aka an Atari Punk Console).
 Project MINI RACK | Miniature rack builds, for portable or compact Homelabs.
https://mini-rack.jeffgeerling.com/
Project MINI RACK is a guide for miniature rack builds, for compact Homelabs, RF battlestations, and portable network racks. Watch the video announcing this project by clicking the image below:
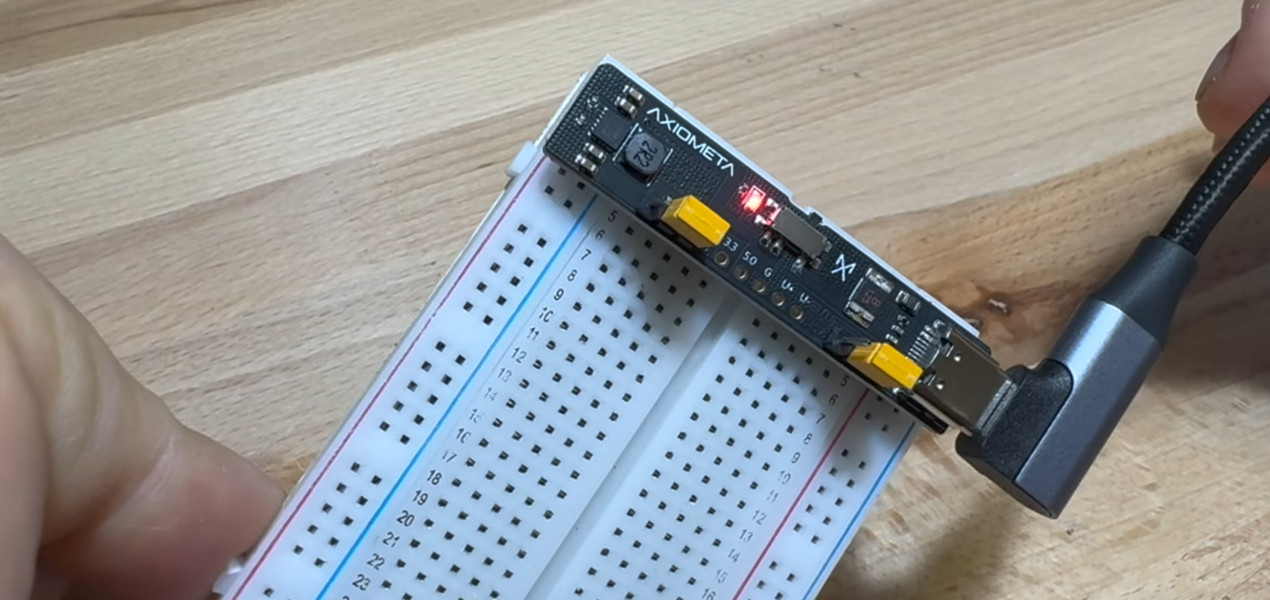
No Frills PCB Brings USB-C Power To The Breadboard | Hackaday
https://hackaday.com/2025/01/06/no-frills-pcb-brings-usb-c-power-to-the-breadboard/
[Axiometa] has recently unveiled a simple PCB that will plug into a standard solderless breadboard to provide 3.3 and 5 VDC when connected to a USB-C power supply. The device is going to start a crowdfunding campaign soon if you want to buy a completed one — but with the design files and Bill of Materials already up on GitHub, nothing stops you from spinning up your own version today.
 My favourite computer ergonomics hack
https://blog.jacobvosmaer.nl/0036-beeper/
The Beeper consitst of three parts: the hardware, the firmware runnning on the hardware, and software running on my work computer. If my computer screen is unlocked for too long, the Beeper starts beeping and because it is situated away from my desk I must get up to silence it. Mission accomplished: I stopped sitting still.
 The Tube Computer
https://www.thetubecomputer.com/
A modern 8 bit design, built with recycled 1950s vacuum tubes, that glow and heat the entire room.
 Paged Out!
https://pagedout.institute/
Paged Out! is a free experimental (one article == one page) technical magazine about programming (especially programming tricks!), hacking, security hacking, retro computers, modern computers, electronics, demoscene, and other similar topics.
E-Ink Screen Combined With Analog Dial Is Epic Win | Hackaday
https://hackaday.com/2024/11/25/e-ink-screen-combined-with-analog-dial-is-epic-win/
The concept is simple—get an e-ink display, and draw a dial on it using whatever graphics and scale you choose. Then, put it behind a traditional coil-driven analog dial in place of the more traditional paper scale. Now, you have an analog dial that can display any quantity you desire. Just update the screen to display a different scale as needed. Meanwhile, if you don’t need to change the display, the e-ink display will draw zero power and still display the same thing.
 USB Insight Hub | Crowd Supply
https://www.crowdsupply.com/aerio-solutions/usb-insight-hub
USB Insight Hub plugs into your computer through a USB Type-C connector and exposes three USB 3.0 downstream ports, each with a 1.3-inch screen that displays relevant information about the attached device. That information includes operating system enumeration name (COMx, TTYx, or drive letter), voltage, and current. USB Insight Hub also allows you to control the individual activation and deactivation of the D+/D- USB 2 data lines to force enumeration and control the power of each downstream device. A small application running on the host computer extracts USB information from the operating system and sends it to the Hub over USB.
 RC2024 – Part 15 – Building A Music Player That Uses The Rotary Encoder Module - Robert Price
https://www.robertprice.co.uk/robblog/rc2024-part-15-building-a-music-player-that-uses-the-rotary-encoder-module/
I wanted to put together all my learning and build a music player for the RC2014. This will run using my RC2014 Classic 2 computer. It uses the LCD Driver Module, and the YM2149 Sound Card Module from Z80Kits. In addition, it also uses my ROM board, and of course the Rotary Encoder Module.
 Educational LCD Oscilloscope Kit EDU08 Velleman | Jameco
https://www.jameco.com/z/WSEDU08-Velleman-Velleman-Educational-LCD-Oscilloscope-Kit-by-Whadda_2261959.html?trk_msg=4P14JF8AODRKB0OJBNA6UIJB1G&trk_contact=0BK3H3I8ID11QJT0HBNJJVJBV0&trk_sid=91VNO9GBV7OR98IEVRIR9Q0KV0&trk_link=S6SL6TGC5GU4PA79DEKMDI4A64&utm_source=FuckOff&utm_medium=FuckOff&utm_term=FuckOff&utm_campaign=FuckOff&utm_content=FuckOff
Build your own oscilloscope and learn how to visualize signals. See the signals you learn about in real life! Despite the low cost, this oscilloscope has many features only found on expensive units like signal markers, frequency, dB, true RMS readouts, etc. This powerful auto-setup function will get you going in a snap!
 Turning Everyday Gadgets into Bombs is a Bad Idea « bunnie's blog
https://www.bunniestudios.com/blog/2024/turning-everyday-gadgets-into-bombs-is-a-bad-idea/
The reason we don’t see exploding battery attacks more often is not because it’s technically hard, it’s because the erosion of public trust in everyday things isn’t worth it. The current discourse around the potential reach of such explosive devices is clouded by the assumption that it’s technically difficult to implement and thus unlikely to find its way to our front door.That assumption is wrong. It is both surprisingly easy to do, and could be nearly impossible to detect. After I read about the attack, it took half an hour to combine fairly common supply chain knowledge with Wikipedia queries to propose the mechanism detailed below.
 How to bring up a 6100 color vector monitor (A PDF guide)
https://forums.arcade-museum.com/threads/how-to-bring-up-a-6100-color-vector-monitor-a-pdf-guide.404600/
Highlight:I've seen a number of folks with questions lately about bringing up 6100 monitors. On that topic, I have a set of notes that I'd been compiling and adding to over time, with info I've learned (sometimes the hard way) from repairing many 6100 monitors and boardsets.
How to bring up a 6100 color vector monitor (A PDF guide)
Hi all,
I've seen a number of folks with questions lately about bringing up 6100 monitors. On that topic, I have a set of notes that I'd been compiling and adding to over time, with info I've learned (sometimes the hard way) from...
Retro Gadgets: The 1974 Breadboard Project | Hackaday
https://hackaday.com/2023/08/29/retro-gadgets-the-1974-breadboard-project/
It is hard to imagine experimenting with electronics without the ubiquitous solderless breadboard. We are sure you have a few within arm’s reach. The little plastic wonders make it easy to throw together a circuit, try it, and then tear it down again. But, surprisingly, breadboards of that type haven’t always been around, and — for a while — they were also an expensive item. Maybe that’s what motivated [R. G. Cooper] to build Slip-n-Clip — his system for quickly building circuits that he published in a 1974 edition of the magazine Elementary Electronics.
Retro Gadgets: The 1974 Breadboard Project | Hackaday
https://hackaday.com/2023/08/29/retro-gadgets-the-1974-breadboard-project
It is hard to imagine experimenting with electronics without the ubiquitous solderless breadboard. We are sure you have a few within arm’s reach. The little plastic wonders make it easy to throw together a circuit, try it, and then tear it down again. But, surprisingly, breadboards of that type haven’t always been around, and — for a while — they were also an expensive item. Maybe that’s what motivated [R. G. Cooper] to build Slip-n-Clip — his system for quickly building circuits that he published in a 1974 edition of the magazine Elementary Electronics.
 The Embroidered Computer | Irene PoschIrene Posch
http://www.ireneposch.net/the-embroidered-computer/
The Embroidered Computer is an exploration into using historic gold embroidery materials and knowledge to craft a programmable 8 bit computer.
Solely built from a variety of metal threads, magnetic, glas and metal beads, and being inspired by traditional crafting routines and patterns, the piece questions the appearance of current digital and electronic technologies surrounding us, as well as our interaction with them.
The Embroidered Computer | Irene PoschIrene Posch
http://www.ireneposch.net/the-embroidered-computer
The Embroidered Computer is an exploration into using historic gold embroidery materials and knowledge to craft a programmable 8 bit computer.
Solely built from a variety of metal threads, magnetic, glas and metal beads, and being inspired by traditional crafting routines and patterns, the piece questions the appearance of current digital and electronic technologies surrounding us, as well as our interaction with them.
 Overview | World's Smallest MAME Arcade Cabinet | Adafruit Learning System
https://learn.adafruit.com/worlds-smallest-mame-arcade-cabinet
 Building a Keyboard: Part 1 - Massively Parallel Procrastination
http://blog.fsck.com/2012/12/building-a-keyboard-part-1.html
Finally reading @obra's "Building a Keyboard: Part 1", realizing I'm doing almost precisely the same things
 OSH Park ~ Welcome
https://oshpark.com/
We bring you high quality, lead free boards (ENIG finish), manufactured in the USA, and shipped for free to anywhere in the world.
OSH Park ~ Welcome
https://oshpark.com
We bring you high quality, lead free boards (ENIG finish), manufactured in the USA, and shipped for free to anywhere in the world.
 MacBook Pro Retina LCD interface board - by ROZSNYO | digital cinema devices
http://dp2mbpr.rozsnyo.com/
Currently this board is in production and we have units IN STOCK !
- pricing $149 (USD, per board) - includes free shipping by your choice (registered post, FedEx)
MacBook Pro Retina LCD interface board - by ROZSNYO | digital cinema devices
http://dp2mbpr.rozsnyo.com
Currently this board is in production and we have units IN STOCK !
- pricing $149 (USD, per board) - includes free shipping by your choice (registered post, FedEx)
 UltraKeet Australia - Microcontrollers NOT ALLOWED (or how to troll your college instructor)
http://ultrakeet.com.au/write-ups/microcontrollers-not-allowed
We'll be physically removing the 'core' of an SN74LS47N display driver, and replacing it with a PIC16F1503 microcontroller.
 artisan - Visual scope for coffee roasters - Google Project Hosting
https://code.google.com/p/artisan/
Artisan is a software that helps coffee roasters record, analyze, and control roast profiles. When used in conjunction with a thermocouple data logger or a proportional–integral–derivative controller (PID controller), this software can automate the creation of roasting metrics to help make decisions that influence the final coffee flavor.
artisan - Visual scope for coffee roasters - Google Project Hosting
https://code.google.com/p/artisan
Artisan is a software that helps coffee roasters record, analyze, and control roast profiles. When used in conjunction with a thermocouple data logger or a proportional–integral–derivative controller (PID controller), this software can automate the creation of roasting metrics to help make decisions that influence the final coffee flavor.
 Replacing obsolete video game circuits with Xilinx CPLDs | EE Times
http://www.eetimes.com/document.asp?doc_id=1274659
In this article, designer In Choi describes a project for his home business in which he replaces a defective part in a 1980s game system to show his full-time employer that they can adopt a methodology using Xilinx programmable devices to replace a range of parts that other semiconductor vendors are no longer producing.
 Rocky's Boots (1982) (The Learning Company) : Free Streaming : Internet Archive
https://archive.org/details/Rockys_Boots_1982_Learning_Company
Rocky's Boots is an educational logic puzzle game by Warren Robinett and Leslie Grimm, published by The Learning Company in 1982. It was released for the Apple II, the CoCo, the Commodore 64 and the IBM PC. It was followed by a more difficult sequel, Robot Odyssey. It won Software of the Year awards from Learning Magazine (1983), Parent's Choice magazine (1983), and Infoworld magazine (1982, runner-up), and received the Gold Award (for selling 100,000 copies) from the Software Publishers Association. It was one of the first educational software products for personal computers to successfully use an interactive graphical simulation as a learning environment.
 Yet Another Arduino 110v Power Controller
http://www.instructables.com/id/Yet-Another-Arduino-110v-Power-Controller/?ALLSTEPS
This Instructable shows you how to build a four-gang outlet box in which each outlet is controlled via an Arduino (or any other TTL level signals).
It differs from the other relay boxes in that it uses no circuit boards and has very few parts (one chip and 4 relays).
Yet Another Arduino 110v Power Controller
http://www.instructables.com/id/Yet-Another-Arduino-110v-Power-Controller?ALLSTEPS=
This Instructable shows you how to build a four-gang outlet box in which each outlet is controlled via an Arduino (or any other TTL level signals).
It differs from the other relay boxes in that it uses no circuit boards and has very few parts (one chip and 4 relays).
 Ken Shirriff's blog: Tiny, cheap, and dangerous: Inside a (fake) iPhone charger
http://www.righto.com/2012/03/inside-cheap-phone-charger-and-why-you.html
Stay away from super-cheap AC adapters built by mystery manufacturers. Spend the extra few dollars to get a brand-name AC adapter. It will be safer, produce less interference, and your device's touchscreen will perform better.
 Project Longhaul - KdN - Kokes dot Net
http://www.kokes.net/projectlonghaul/projectlonghaul.htm
Once upon a time, a boy met a girl. Then a short amount of time later, the boy decided to design and build a ring for the girl, because doing things in the most complicated way possible is just what he does to show the love. This is that story.
 Binary to Decimal and Hexadecimal Conversion & Memorization Chart
http://www.learn44.com/wp-content/uploads/2011/08/Binary-to-Decimal-and-Hexadecimal-Conversion-Memorization-Chart.jpg
 The Serial Peripheral Interface (SPI)
http://avrbeginners.net/architecture/spi/spi.html
The SPI (Serial Peripheral Interface) is a peripheral used to communicate between the AVR and other devices, like others AVRs, external EEPROMs, DACs, ADCs, etc. With this interface, you have one Master device which initiates and controls the communication, and one or more slaves who receive and transmit to the Master.
 bcm2835: C library for Broadcom BCM 2835 as used in Raspberry Pi
http://www.airspayce.com/mikem/bcm2835/
This is a C library for Raspberry Pi (RPi). It provides access to GPIO and other IO functions on the Broadcom BCM 2835 chip, allowing access to the GPIO pins on the 26 pin IDE plug on the RPi board so you can control and interface with various external devices.
bcm2835: C library for Broadcom BCM 2835 as used in Raspberry Pi
http://www.airspayce.com/mikem/bcm2835
This is a C library for Raspberry Pi (RPi). It provides access to GPIO and other IO functions on the Broadcom BCM 2835 chip, allowing access to the GPIO pins on the 26 pin IDE plug on the RPi board so you can control and interface with various external devices.
 Brian's Life: Getting SPI working on the Raspberry Pi
http://www.brianhensley.net/2012/07/getting-spi-working-on-raspberry-pi.html
This post is the 'how to' on getting your SPI signals outputting from your Raspberry Pi.
 SPI Command-line Utility for Raspberry Pi | iP Solutions
http://ipsolutionscorp.com/raspberry-pi-spi-utility/
iP Solutions has created a Serial Peripheral Interface (SPI) command-line utility for the Raspberry Pi (www.raspberrypi.org) platform. The utility, spincl, is licensed under Open Source GNU GPLv3 and is being offered by iP Solutions as a free download with source included.
SPI Command-line Utility for Raspberry Pi | iP Solutions
http://ipsolutionscorp.com/raspberry-pi-spi-utility
iP Solutions has created a Serial Peripheral Interface (SPI) command-line utility for the Raspberry Pi (www.raspberrypi.org) platform. The utility, spincl, is licensed under Open Source GNU GPLv3 and is being offered by iP Solutions as a free download with source included.
 [Tut] – Using HD44780 based LCDs – JHD162A | Suhas's Blog
http://iamsuhasm.wordpress.com/tutsproj/using-lcds/
I finally dug out that LCD from the mess in my room and got it to work :) . Turns out , its really simple. You dont even need a microcontroller to do it.
[Tut] – Using HD44780 based LCDs – JHD162A | Suhas's Blog
http://iamsuhasm.wordpress.com/tutsproj/using-lcds
I finally dug out that LCD from the mess in my room and got it to work :) . Turns out , its really simple. You dont even need a microcontroller to do it.
 Wiring the Cobbler to the LCD | Drive a 16x2 LCD with the Raspberry Pi | Adafruit Learning System
http://learn.adafruit.com/drive-a-16x2-lcd-directly-with-a-raspberry-pi/wiring
Whenever you come across a LCD that looks like it has 16 connectors it is most likely using a HD44780 controller. These devices provide the same pinouts making them relatively easy to work with. The LCD uses a parallel interface meaning that we will need many pins from our raspberry pi to control it. In this tutorial we will use 4 data pins (4-bit mode) and two control pins.
 Ben's Blog » μJoypad [+ ..]
http://blog.benbergman.ca/2012/11/01/%CE%BCjoypad/
A couple months ago I saw an article or video of the world’s largest game controller and thought to myself “I bet I could make the smallest” and so I did.
Ben's Blog » μJoypad [+ ..]
http://blog.benbergman.ca/2012/11/01/%CE%BCjoypad
A couple months ago I saw an article or video of the world’s largest game controller and thought to myself “I bet I could make the smallest” and so I did.
 Arduino Playground - LCD3wires
http://playground.arduino.cc/Code/LCD3wires
This post is based on the work made previously by tomek in wiring LCD displays using 4 bits. The basic idea is to group the 7 pins that are needed to drive the LCD in only 3 using a shift register. This is a cheap alternative to serial LCDs.
 Introduction to 74HC595 shift register – Controlling 16 LEDs - Tutorials
http://www.protostack.com/blog/2010/05/introduction-to-74hc595-shift-register-controlling-16-leds/
This tutorial shows you how to control 16 LEDs with just 3 control lines. We do this by daisy chaining 74HC595 shift registers
Introduction to 74HC595 shift register – Controlling 16 LEDs - Tutorials
http://www.protostack.com/blog/2010/05/introduction-to-74hc595-shift-register-controlling-16-leds
This tutorial shows you how to control 16 LEDs with just 3 control lines. We do this by daisy chaining 74HC595 shift registers
 3-Wire Serial LCD using a Shift Register
http://www.electronics-lab.com/projects/mcu/015/
HD44780 based character LCDs require at least 6 I/O lines from microcontroller to display data. Therefore, they are not suitable for low-pin microcontrollers like PIC12F series microchips. In this project, I am going to show how to drive an HD44780 based LCD display with only 3 pins of a microcontroller. I am going to demonstrate it with PIC12F683 microchip. The character data and command from the microcontroller is transferred serially to a shift register (74HC595), and the parallel output from the shift register is fed to LCD pins.
3-Wire Serial LCD using a Shift Register
http://www.electronics-lab.com/projects/mcu/015
HD44780 based character LCDs require at least 6 I/O lines from microcontroller to display data. Therefore, they are not suitable for low-pin microcontrollers like PIC12F series microchips. In this project, I am going to show how to drive an HD44780 based LCD display with only 3 pins of a microcontroller. I am going to demonstrate it with PIC12F683 microchip. The character data and command from the microcontroller is transferred serially to a shift register (74HC595), and the parallel output from the shift register is fed to LCD pins.
 mignev/shiftpi
https://github.com/mignev/shiftpi
ShiftPi is the easiest way to work with 74HC595 shift registers on your Raspberry Pi in Arduino style :)
 Bi-Color LED bargraph BL-AR12B3010xx
http://www.adafruit.com/datasheets/BL-AR12Z3010DUG.pdf
Overview | Drive a 16x2 LCD with the Raspberry Pi | Adafruit Learning System
http://learn.adafruit.com/drive-a-16x2-lcd-directly-with-a-raspberry-pi
Adding a LCD to any project immediately kicks it up a notch. This tutorial explains how to connect a inexpensive HDD44780 compatible LCD to the raspberry pi using 6 GPIOs. While there are other ways to connect using I2C or the UART this is the most direct method that get right down to the bare metal.
 The $12 Gongkai Phone « bunnie's blog
http://www.bunniestudios.com/blog/?p=3040
Recently, I paid $12 at Mingtong Digital Mall for a complete phone, featuring quad-band GSM, Bluetooth, MP3 playback, and an OLED display plus keypad for the UI. Simple, but functional; nothing compared to a smartphone, but useful if you’re going out and worried about getting your primary phone wet or stolen.
The $12 Gongkai Phone « bunnie's blog
http://www.bunniestudios.com/blog?p=3040
Recently, I paid $12 at Mingtong Digital Mall for a complete phone, featuring quad-band GSM, Bluetooth, MP3 playback, and an OLED display plus keypad for the UI. Simple, but functional; nothing compared to a smartphone, but useful if you’re going out and worried about getting your primary phone wet or stolen.
Overview | MCP230xx GPIO Expander on the Raspberry Pi | Adafruit Learning System
http://learn.adafruit.com/mcp230xx-gpio-expander-on-the-raspberry-pi
While the Raspberry Pi packs and awful lot of punch for the price, and it's fairly flexible where HW expandability is concerned, there are situations where you might want a bit more basic digital IO. Thankfully, it's an easy problem to solve with an I2C-enabled device like the MCP23008 (for an extra 8 GPIO pins) or the MCP23017 (for an extra 16 GPIO pins). This tutorial will show you how you can get up and running quickly with either of these chips.
 Turning the Raspberry Pi Into an FM Transmitter - Imperial College Robotics Society Wiki
http://www.icrobotics.co.uk/wiki/index.php/Turning_the_Raspberry_Pi_Into_an_FM_Transmitter
Now connect a 20cm or so plain wire to GPIO 4 to act as an antenna, and tune an FM radio to 103.3Mhz
 Technical books online
http://www.tubebooks.org/technical_books_online.htm
I've found that most of the technical books published before about 1964 never had their copyrights renewed, so now are in the public domain. So I am endeavoring to digitize and post some selected books relating to the "vacuum tube age" of electronics here.
Great Scott! DeLorean-Inspired Time Circuit Clock with Adafruit gear! « adafruit industries blog
http://www.adafruit.com/blog/2012/07/02/great-scott-delorean-inspired-time-circuit-clock-with-adafruit-gear/
From the moment these LED displays made an appearance on our weekly Ask an Engineer show, comparisons were being made to the DeLorean time circuit from the Back to the Future films. It was a moral imperative then to make a demo! If you’re handy with Arduino and some shop tools, you should be able to pull off something similar (better, even), or adapt the ideas to other projects. This was quickly built in fun, so please don’t expect the same level of polish as a finished product tutorial.
Great Scott! DeLorean-Inspired Time Circuit Clock with Adafruit gear! « adafruit industries blog
http://www.adafruit.com/blog/2012/07/02/great-scott-delorean-inspired-time-circuit-clock-with-adafruit-gear
From the moment these LED displays made an appearance on our weekly Ask an Engineer show, comparisons were being made to the DeLorean time circuit from the Back to the Future films. It was a moral imperative then to make a demo! If you’re handy with Arduino and some shop tools, you should be able to pull off something similar (better, even), or adapt the ideas to other projects. This was quickly built in fun, so please don’t expect the same level of polish as a finished product tutorial.
Tweet-a-Watt starter pack ID: 143 - $90.00 : Adafruit Industries, Unique & fun DIY electronics and kits
http://www.adafruit.com/products/143
Tweet-a-Watt is a DIY wireless power monitoring system. The project uses an 'off the shelf' power monitor called the Kill-a-Watt and adds wireless reporting. Each plug transmits the power usage at that outlet to a central computer receiver. The receiver can then log, graph and report the data. This pack contains nearly everything* necessary to build a single outlet monitor and receiver. To monitor additional outlets, you will need an add-on transmitter pack. One outlet can monitor up to 1500 Watts.
 SICKmods : Xbox1 > Power Eject Pinouts
http://diy.sickmods.net/Tutorials/Xbox1/Power-Eject_Pinouts/
A LOT of people are having the problem that the xbox turns on automatically when you plug in the power and then they must unplug it to turn it off. This is going to help most of those people I hope.
SICKmods : Xbox1 Power Eject Pinouts
http://diy.sickmods.net/Tutorials/Xbox1/Power-Eject_Pinouts
A LOT of people are having the problem that the xbox turns on automatically when you plug in the power and then they must unplug it to turn it off. This is going to help most of those people I hope.
 The Llamma's Game Console Forums • View topic - Trace Corrosion Repair Tutorial Part 2
http://forums.llamma.com/viewtopic.php?t=12694
It has been pointed out by chunkhead from the afterdawn.com and llama.com Forums that some X-Box motherboards have a corrosion problem on some traces.
This corrosion is due to some sort of contamination from the factory.
Due to this corrosion, it was found that some X-Boxes affected can produce the following symptoms:
(1) The X-Box fails to power down using the power on/off button on the front panel. The power cord has to be pulled out to shut it down.
(2) As soon as the power cord is plugged in, the X-Box powers up without pressing either the on/off or eject buttons.
(3) While the X-Box is on for a certain amount of time, it shuts down by itself for no reason. The time factor before shut down can vary wildly.
 Project Log : Arduino USB - ProjectLogArduinoUSB
http://code.rancidbacon.com/ProjectLogArduinoUSB
Project log for developing USB expansion shield for Arduino and associated code.
On Counterfeit Chips in US Military Hardware « bunnie's blog
http://www.bunniestudios.com/blog?p=2037
Amendment 1092 to the Defense Authorization Act of 2012 is a well-intentioned but misguided provision outlining measures designed to reduce the prevalance of counterfeit chips in the US military supply chain.
Iron on Patches : Adafruit Industries, Unique & fun DIY electronics and kits
http://www.adafruit.com/category/70
Iron on Patches
 USB Host Shield 2.0 for Arduino « Circuits@Home
http://www.circuitsathome.com/products-page/arduino-shields/usb-host-shield-2-0-for-arduino
This is revision 2.0 of USB Host Shield. Thanks to new interface layout it is now compatible with more Arduinos – not only UNO and Duemilanove, but also big Mega and Mega 2560 work with Standard variant of this shield out of the box. No more SPI re-wiring and code modifications – just solder included stackable connectors (2×3 ICSP connector’s female side should be facing down), plug and play!
 LCD tutorial - making a 'shield'
http://www.ladyada.net/learn/lcd/lcdshield.html
This tutorial will show you how to solder together a shield for an LCD with a 8x2 header
 The Pragmatic Bookshelf | PragPub 2011-08 | Make Your Own Video Game System
http://pragprog.com/magazines/2011-08/make-your-own-video-game-system
TVout + Wii nunchuk = awesome
 Arduino Forum - Hue-controllable RGB LED lamp
http://www.arduino.cc/cgi-bin/yabb2/YaBB.pl?num=1207331496
The hardest part was converting HSB into RGB - the equations that I worked on from wikipedia are an absolute nightmare to translate into code (at least for me at this stage). I was about to give up when I saw this link, full of ready-made colour conversion functions: http://www.easyrgb.com/math.php?MATH=M21#text21.
 The Life of Kenneth: So You Want to Build Electronics
http://kennethfinnegan.blogspot.com/2011/06/so-you-want-to-build-electronics.html
So here is a gigantic list of everything I would buy right now to replace my entire workshop if mine were to disappear. I'm going to try and separate it into some sort of reasonable order as far as importance, but the point is that you see all of this, and use it as inspiration to put together your own collection.
Sensor tutorials - IR remote receiver/decoder tutorial
http://www.ladyada.net/learn/sensors/ir.html
IR detectors are little microchips with a photocell that are tuned to listen to infrared light. They are almost always used for remote control detection - every TV and DVD player has one of these in the front to listen for the IR signal from the clicker. Inside the remote control is a matching IR LED, which emits IR pulses to tell the TV to turn on, off or change channels. IR light is not visible to the human eye, which means it takes a little more work to test a setup.
Audio Shield for Arduino
http://www.ladyada.net/make/waveshield
Adding quality audio to an electronic project is surprisingly difficult. People tend to end up either using low-quality ISD chips (you might get 8Khz sampling rate for 30seconds out of these, if you're lucky!) or mucking around with trying to control a CD or MP3 player. Although it's possible to generate audio direct from a microcontroller using a PWM output, the quality is often low and its hard to fit a lot of music in an EEPROM chip. You can buy an embedded MP3 player board, but they're either expensive or difficult to use!
 Arduino GPS System | Sean Carney's Website
http://www.seancarney.ca/projects/arduino-gps-receiver/arduino-gps-system
"A fully functional GPS receiver with the ability to display the current location, heading, speed, average speed and maximum speed, the distance traveled, the bearing, distance and ETA for a way-point, and the date and time."
 Bumble-B: Mini USB Development Kit | fletchtronics.net
http://fletchtronics.net/bumble-b
"So you want to build USB enabled devices. Bumble-B is here to help!
It is a breakout board for Atmel's at90usb162 microcontroller, along with supporting hardware and USB connector. It is DIP-24/600mil shape, and works very well on a breadboard."
 The Dead Battery Society
http://www.arcadecollecting.com/dead/dead.html
"Several arcade game manufacturers decided it would be a good idea to put a battery on their game boards that, when they die (and they will die), disable the game. Why they did this isn't exactly clear. Usually the way suicide batteries work is, the batteries supply power to a bit of RAM that holds a decryption table. This table is the key to decrypting the encrypted program stored in the board's ROMs. When the battery dies, this table goes away and the program code can no longer be decrypted. The CPU no longer has valid code to execute. The board stops working."
 Folding Plug System
http://www.minkyu.co.uk/Site/Product/Entries/2009/4/20_Folding_Plug_System.html
"‘Folding Plug’ changes the shape form the normal U.K plug into a 10mm thickness object"
 Homebrewed CPU Is a Beautiful Mess of Wires | Gadget Lab | Wired.com
http://www.wired.com/gadgetlab/2009/05/homebrewed-cpu
 Big Mess o’ Wires » Wire-Wrap Photos
http://www.stevechamberlin.com/cpu/2009/02/02/wire-wrap-photos
"I finished wiring the audio circuitry for BMOW yesterday, which marks the end of wiring for BMOW… for version 1 at least! I took the opportunity to reflect on my wire-wrapping odyssey, and took a bazillion photos of the namesake Big Mess o’ Wires before it disappears forever into an opaque case. It’s really quite a sight. There are 1253 wires with 2506 individually-wrapped connections, and I’ve got every one logged in a spreadsheet."
 Sony Releases New Stupid Piece Of Shit That Doesn't Fucking Work | The Onion - America's Finest News Source
http://www.theonion.com/content/video/sony_releases_new_stupid_piece_of
Hidden USB Storage
http://www.instructables.com/id/Hidden_USB_Storage
"If you're like me, you may or may not have secret files plotting world domination and other devious deeds. These files obviously need to be hidden from the prying eyes of sisters, FBI agents, grandparents, etc. We are going to convert a phone jack in the wall into a secret USB memory device."
 Evil Mad Scientist Laboratories - The Great Internet Migratory Box Of Electronics Junk
http://www.evilmadscientist.com/article.php/junkbox
"There are many boxes. And they have a plan. "
 Main Page - Tgimboej
http://tgimboej.org
"The Great Internet Migratory Box Of Electronics Junk is a progressive lending library of electronic components. An internet meme in physical form halfway between P2P zip-archive sharing and a flea market. It arrives full of wonderful (and possibly useles
 IEC connector - Wikipedia, the free encyclopedia
http://en.wikipedia.org/wiki/IEC_connector
"IEC connector is the common name for the set of thirteen line sockets (called the connector in the specification) and thirteen panel plugs (called the inlet) defined by International Electrotechnical Commission (IEC) specification IEC 60320 (formerly IEC
 Billions of electronic-eating 'crazy rasberry ants' invade Texas - Times Online
http://www.timesonline.co.uk/tol/news/world/us_and_americas/article3941545.ece
"It sounds like the plot of a farfetched science fiction movie. Unfortunately for the residents of Texas, it is very much a reality: billions of tiny reddish-brown ants have arrived onshore from a cargo ship and are hell-bent on eating anything electronic
 leah buechley - LilyPad Arduino - introduction
http://www.cs.colorado.edu/~buechley/LilyPad/index.html
"The LilyPad Arduino is a set of sewable electronic components that let you build your own soft, interactive fashion."
 DAK Industries 2000 - What Happened to DAK 1?
http://www.dak.com/whathappened.cfm
"For over 30 years DAK Industries 1 was the most exciting, informative place to find electronic breakthroughs to enhance our productivity and our leisure time activities. So, what could possibly have gone wrong? Read on."
 DIY laser long-distance listening device - DIY Life
http://www.diylife.com/2007/08/22/diy-laser-long-distance-listening-device
 Essential Electronics for Software Folk
http://www.pragmaticprogrammer.com/titles/ctelec/index.html
"Are you a programmer or computer enthusiast? Do you feel comfortable with methods, functions, and variables? Do you wish you knew more about how the computer made it all work?"
Evil Mad Scientist Laboratories - Circuitry Snacks
http://www.evilmadscientist.com/article.php/circuitsnacks
"Here we present what is arguably the tastiest way to design and learn about electronic circuits: make circuitry snacks!"
 The MyCPU - Project: A homebrew computer by Dennis Kuschel
http://www.mycpu.eu
"The MyCPU is a "Central Processing Unit" that is completely built with discrete logic gates."
 Joho the Blog: Physical DRM
http://www.hyperorg.com/blogger/mtarchive/physical_drm.html
"You forced me into stabbing your product with a carving knife. Is that really the sort of "initial user experience" you were hoping for?"
 Geekularity - Latest Project - Programmable Status Board
http://geekularity.com/blog/2006/12/07/Latest%20Project%20%20Programmable%20Status%20Board.aspx
"I began to build this automated statusboard to help me monitor systems for me and my clients."
 CHICAGO SUN-TIMES :: Andy Ihnatko :: Avoid the loony Zune
http://www.suntimes.com/technology/ihnatko/147048,CST-FIN-Andy23.article
'"What are the things that users want and Apple refuses to provide?" Microsoft's colossal blunder was to knock the user out of that question and put the music industry in its place.'
 todbot blog ‽ Blog Archive ‽ Arduino, the Basic Stamp killer
http://todbot.com/blog/2006/09/25/arduino-the-basic-stamp-killer
"A new system called Arduino provides the benefits of the Basic Stamp at a greatly reduced cost, increased speed, and is entirely open-source."