 Installing K3s on the Raspberry Pi 5: A Step-by-Step Guide– PicoCluster LLC
https://www.picocluster.com/blogs/picocluster-software-engineering/installing-k3s-on-the-raspberry-pi-5-a-step-by-step-guide
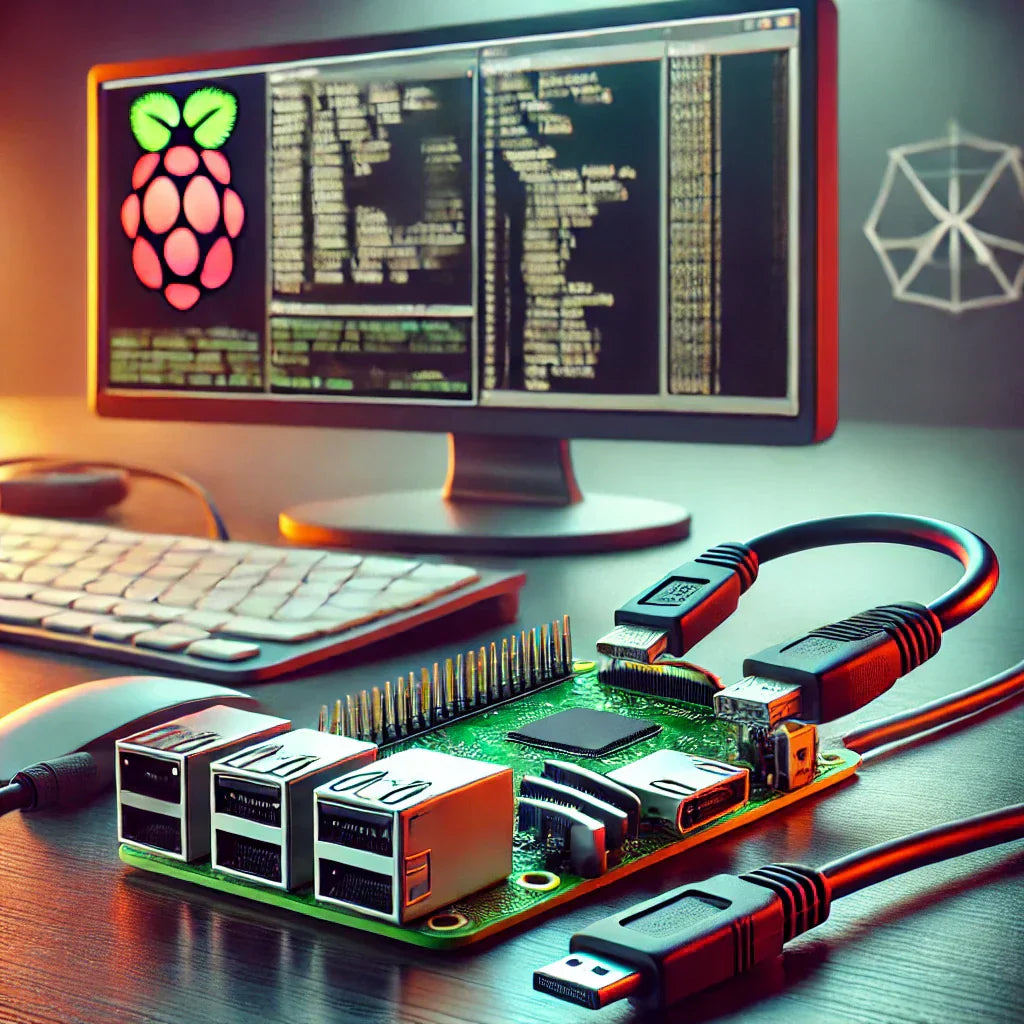
In this guide, we’ll walk you through the process of installing K3s on a Raspberry Pi 5 running Raspberry Pi OS.
 Untitled
https://cbm-pi1541.firebaseapp.com/
Pi1541 is a real-time, cycle exact, Commodore 1541 disk drive emulator that can run on a Raspberry Pi 3B, 3B+ or 3A+.
Cbm pi1541
https://cbm-pi1541.firebaseapp.com
Pi1541 is a real-time, cycle exact, Commodore 1541 disk drive emulator that can run on a Raspberry Pi 3B, 3B+ or 3A+.
 The PiModem Project - Retro BBS and dialup fun!
http://podsix.org/articles/pimodem/
Connect to BBS's (via telnet) and the Internet (via PPP) from your old computer!
The PiModem Project - Retro BBS and dialup fun!
http://podsix.org/articles/pimodem
Connect to BBS's (via telnet) and the Internet (via PPP) from your old computer!
 How to Make a Raspberry Pi Media Panel (fka Digital Photo Frame) - All
http://www.instructables.com/id/How-to-Make-a-Raspberry-Pi-Media-Panel-fka-Digita/?ALLSTEPS
How to Make a Raspberry Pi Media Panel (fka Digital Photo Frame) - All
http://www.instructables.com/id/How-to-Make-a-Raspberry-Pi-Media-Panel-fka-Digita?ALLSTEPS=
 Raspberry Pi b+ and max7219 LED matrix ~ Jon Carlos (webmonger) personal blog itsux.com
http://blog.itsux.com/2015/03/raspberry-pi-b-and-max7219-led-matrix.html
 Jookie's home page » CosmosEx
http://joo.kie.sk/?page_id=384
CosmosEx is a device for Atari ST computers which replaces multiple peripherals in single box. Your Atari peripheral cosmos is now expanding!
 Fxos on RaspberryPi - MozillaWiki
https://wiki.mozilla.org/Fxos_on_RaspberryPi
We are looking to demonstrate that Firefox OS can be a viable and valuable operating system for Raspberry Pi boards, and for the wide variety of use cases that are being imagined today by the Webmakers of tomorrow
 Raspberry Pi + Spotify Media Server, tape player as interface | Neural
http://neural.it/microposts/raspberry-pi-spotify-media-server-tape-player-as-interface/
Matt Brailsford used a modified old tape player as interface to this Raspberry Pi + Spotify Media Server, so listener can use the player (and the cassettes) as physical interface to the different playlists.
Raspberry Pi + Spotify Media Server, tape player as interface | Neural
http://neural.it/microposts/raspberry-pi-spotify-media-server-tape-player-as-interface
Matt Brailsford used a modified old tape player as interface to this Raspberry Pi + Spotify Media Server, so listener can use the player (and the cassettes) as physical interface to the different playlists.
 Insentricity :: Making a Raspberry Pi into an unified retro peripheral ::
http://www.insentricity.com/a.cl/207/MakingARaspberryPiIn
If you've been following along here or on Twitter or Google+ you've no doubt seen the experimenting I've been doing with interfacing a Raspberry Pi in various ways with several retro computers like the Atari 800 and Commodore 64. My first project was using the Raspberry Pi to act as a converter for a USB gamepad to turn it into an Atari 2600 style joystick.
 Cheap, overkill Amiga network adapter - blog.jmp.no
http://jmp.no/blog/cheap-overkill-amiga-network-adapter
Since the Raspberry Pi was just sitting there, and the Amiga lacked (*) a network adapter - why not just connect the dots and get something up and running? I did, and it worked. Here's a quick writeup on what I did - if anyone's interested I can write a more detailed post with all the information I have.
 Pibow Belt Base for Raspberry Pi by pburgess « adafruit industries blog
http://www.adafruit.com/blog/2013/03/08/pibow-belt-base-for-raspberry-pi-by-pburgess/
REQUIRES PIBOW CASE – this is ONLY a replacement bottom layer. Laser cut from 3mm (1/8″) acrylic.
The belt is made from 1.5″ nylon webbing (better-equipped hardware, sewing or camping stores will stock this and related fittings), but it’s also perfectly suited to most camera straps if you have a DSLR + Raspberry Pi project in mind. The USB battery pack is an item from the Adafruit shop, held in place with cable ties.
Pibow Belt Base for Raspberry Pi by pburgess « adafruit industries blog
http://www.adafruit.com/blog/2013/03/08/pibow-belt-base-for-raspberry-pi-by-pburgess
REQUIRES PIBOW CASE – this is ONLY a replacement bottom layer. Laser cut from 3mm (1/8″) acrylic.
The belt is made from 1.5″ nylon webbing (better-equipped hardware, sewing or camping stores will stock this and related fittings), but it’s also perfectly suited to most camera straps if you have a DSLR + Raspberry Pi project in mind. The USB battery pack is an item from the Adafruit shop, held in place with cable ties.
 Codebits: The Codebits Digital Signage Project (Part I)
https://codebits.eu/s/blog/c89f80ca02910f48ac4cede8c3ce5cd7
We’ve been so busy we haven’t had time to do a proper write-up of this yet, but this year we decided to revamp the on-site displays (both overhead projections and LCDs).
And given that 2012 is pretty much the year of the Raspberry Pi, we decided to have a go at it using these amazing little boxes – after all, they’re pretty much perfect for the job given that they have an HDMI output, an Ethernet port and more than enough smarts to run a browser and playback H.264 video.
 sapo / digital-signage-client
https://github.com/sapo/digital-signage-client
The SAPO Digital Signage Client v2.0
 Proto Armour for Raspberry Pi | MobileApp Systems
http://www.mobileappsystems.com/hardware/protoarmour/raspberrypi
Proto Armour for Raspberry Pi is a protective enclosure designed specifically for the very popular Raspberry Pi credit-card sized computer
 XBMC OS on Stealth Nighthawk F-117A TVDongle | Indiegogo
http://www.indiegogo.com/projects/xbmc-os-on-stealth-nighthawk-f-117a-tvdongle
Stealth Nighthawk F-117A is an easy to use XBMC device, with the same soc as the Raspberry PI, that makes it easy for you to run Open Source software that are supported by Raspberry PI, but with a nice, small and fancy design not bigger than your car keys.
 The Serial Peripheral Interface (SPI)
http://avrbeginners.net/architecture/spi/spi.html
The SPI (Serial Peripheral Interface) is a peripheral used to communicate between the AVR and other devices, like others AVRs, external EEPROMs, DACs, ADCs, etc. With this interface, you have one Master device which initiates and controls the communication, and one or more slaves who receive and transmit to the Master.
 bcm2835: C library for Broadcom BCM 2835 as used in Raspberry Pi
http://www.airspayce.com/mikem/bcm2835/
This is a C library for Raspberry Pi (RPi). It provides access to GPIO and other IO functions on the Broadcom BCM 2835 chip, allowing access to the GPIO pins on the 26 pin IDE plug on the RPi board so you can control and interface with various external devices.
bcm2835: C library for Broadcom BCM 2835 as used in Raspberry Pi
http://www.airspayce.com/mikem/bcm2835
This is a C library for Raspberry Pi (RPi). It provides access to GPIO and other IO functions on the Broadcom BCM 2835 chip, allowing access to the GPIO pins on the 26 pin IDE plug on the RPi board so you can control and interface with various external devices.
 Brian's Life: Getting SPI working on the Raspberry Pi
http://www.brianhensley.net/2012/07/getting-spi-working-on-raspberry-pi.html
This post is the 'how to' on getting your SPI signals outputting from your Raspberry Pi.
 SPI Command-line Utility for Raspberry Pi | iP Solutions
http://ipsolutionscorp.com/raspberry-pi-spi-utility/
iP Solutions has created a Serial Peripheral Interface (SPI) command-line utility for the Raspberry Pi (www.raspberrypi.org) platform. The utility, spincl, is licensed under Open Source GNU GPLv3 and is being offered by iP Solutions as a free download with source included.
SPI Command-line Utility for Raspberry Pi | iP Solutions
http://ipsolutionscorp.com/raspberry-pi-spi-utility
iP Solutions has created a Serial Peripheral Interface (SPI) command-line utility for the Raspberry Pi (www.raspberrypi.org) platform. The utility, spincl, is licensed under Open Source GNU GPLv3 and is being offered by iP Solutions as a free download with source included.
 Raspberry Pi Internet Radio | Usual Panic
http://usualpanic.com/2013/05/raspberry-pi-internet-radio/
How cool would it be take a vintage 1940′s or 1950′s wooden radio and rebuild it as a modern Internet Radio? That’s the premise I had in mind when I started out on my first Raspberry Pi project.
Raspberry Pi Internet Radio | Usual Panic
http://usualpanic.com/2013/05/raspberry-pi-internet-radio
How cool would it be take a vintage 1940′s or 1950′s wooden radio and rebuild it as a modern Internet Radio? That’s the premise I had in mind when I started out on my first Raspberry Pi project.
 Firefox OS for Raspberry Pi: Now Available
http://www.philipp-wagner.com/blog/2013/04/firefox-os-for-raspberry-pi-now-available/
It has been quite some time since my last post about Firefox OS running on a Raspberry Pi, but the questions didn’t stop to come in “when will it be released”? Well, I’m sorry that it took so long (sometimes finding time is not that easy), but finally, here we are: the sources and build instructions are available!
Firefox OS for Raspberry Pi: Now Available
http://www.philipp-wagner.com/blog/2013/04/firefox-os-for-raspberry-pi-now-available
It has been quite some time since my last post about Firefox OS running on a Raspberry Pi, but the questions didn’t stop to come in “when will it be released”? Well, I’m sorry that it took so long (sometimes finding time is not that easy), but finally, here we are: the sources and build instructions are available!
 Wiring the Cobbler to the LCD | Drive a 16x2 LCD with the Raspberry Pi | Adafruit Learning System
http://learn.adafruit.com/drive-a-16x2-lcd-directly-with-a-raspberry-pi/wiring
Whenever you come across a LCD that looks like it has 16 connectors it is most likely using a HD44780 controller. These devices provide the same pinouts making them relatively easy to work with. The LCD uses a parallel interface meaning that we will need many pins from our raspberry pi to control it. In this tutorial we will use 4 data pins (4-bit mode) and two control pins.
 3-Wire Serial LCD using a Shift Register
http://www.electronics-lab.com/projects/mcu/015/
HD44780 based character LCDs require at least 6 I/O lines from microcontroller to display data. Therefore, they are not suitable for low-pin microcontrollers like PIC12F series microchips. In this project, I am going to show how to drive an HD44780 based LCD display with only 3 pins of a microcontroller. I am going to demonstrate it with PIC12F683 microchip. The character data and command from the microcontroller is transferred serially to a shift register (74HC595), and the parallel output from the shift register is fed to LCD pins.
3-Wire Serial LCD using a Shift Register
http://www.electronics-lab.com/projects/mcu/015
HD44780 based character LCDs require at least 6 I/O lines from microcontroller to display data. Therefore, they are not suitable for low-pin microcontrollers like PIC12F series microchips. In this project, I am going to show how to drive an HD44780 based LCD display with only 3 pins of a microcontroller. I am going to demonstrate it with PIC12F683 microchip. The character data and command from the microcontroller is transferred serially to a shift register (74HC595), and the parallel output from the shift register is fed to LCD pins.
mignev/shiftpi
https://github.com/mignev/shiftpi
ShiftPi is the easiest way to work with 74HC595 shift registers on your Raspberry Pi in Arduino style :)
Overview | Drive a 16x2 LCD with the Raspberry Pi | Adafruit Learning System
http://learn.adafruit.com/drive-a-16x2-lcd-directly-with-a-raspberry-pi
Adding a LCD to any project immediately kicks it up a notch. This tutorial explains how to connect a inexpensive HDD44780 compatible LCD to the raspberry pi using 6 GPIOs. While there are other ways to connect using I2C or the UART this is the most direct method that get right down to the bare metal.
 Raspberry Pi in a NES Case - Part 1 - Wiring up the front panel and external connectors // Igor's Blog
http://www.igorkromin.net/index.php/2013/01/08/raspberry-pi-in-a-nes-case-part-1-wiring-up-the-front-panel-and-external-connectors/
When mine arrived, I didn’t really know what to use it for, but then it hit me: I can build an emulator box for all the NES and SNES games that I loved to play as a child.
Raspberry Pi in a NES Case - Part 1 - Wiring up the front panel and external connectors // Igor's Blog
http://www.igorkromin.net/index.php/2013/01/08/raspberry-pi-in-a-nes-case-part-1-wiring-up-the-front-panel-and-external-connectors
When mine arrived, I didn’t really know what to use it for, but then it hit me: I can build an emulator box for all the NES and SNES games that I loved to play as a child.
 MAKE | Arduino Uno vs BeagleBone vs Raspberry Pi
http://blog.makezine.com/2013/04/15/arduino-uno-vs-beaglebone-vs-raspberry-pi/
The three models (all of which we use here at Digital Diner) are the Arduino, Raspberry Pi and BeagleBone. We chose these three because they are all readily available, affordable, about the same size (just larger than 2″ x 3″) and can all be used for creating wonderful digital gadgets. Before we get to the comparison, here is a brief introduction to each one.
MAKE | Arduino Uno vs BeagleBone vs Raspberry Pi
http://blog.makezine.com/2013/04/15/arduino-uno-vs-beaglebone-vs-raspberry-pi
The three models (all of which we use here at Digital Diner) are the Arduino, Raspberry Pi and BeagleBone. We chose these three because they are all readily available, affordable, about the same size (just larger than 2″ x 3″) and can all be used for creating wonderful digital gadgets. Before we get to the comparison, here is a brief introduction to each one.
 Interlock Rochester | Rochester's Hackerspace / Makerspace » Blog Archive » Raspberry Pi-ing, MacGyver Style
http://interlockroc.org/2012/12/06/raspberry-pi-macgyver/
Ok, so there’s no duct tape, toothpicks, or bubble gum involved, but I thought it’d be helpful to document a handy way to tinker with your Raspberry Pi, even when you’re almost completely lacking in the required external paraphernalia.
Interlock Rochester | Rochester's Hackerspace / Makerspace » Blog Archive » Raspberry Pi-ing, MacGyver Style
http://interlockroc.org/2012/12/06/raspberry-pi-macgyver
Ok, so there’s no duct tape, toothpicks, or bubble gum involved, but I thought it’d be helpful to document a handy way to tinker with your Raspberry Pi, even when you’re almost completely lacking in the required external paraphernalia.
 News Download - Raspberry Pi Headless
http://www.newsdownload.co.uk/pages/RPiHeadless.html
For running systems with a Raspberry Pi computer which do not require any auxiliary devices to be connected. For example web, FTP, file, media, database servers. Yet the Raspberry Pi device is still accessible enough in isolation, to be able to administer the system independently.
 Pi Crust
http://picru.st/
I'm a breakout board for the Raspberry Pi. I make it easy to connect electronics.
Pi Crust
http://picru.st
I'm a breakout board for the Raspberry Pi. I make it easy to connect electronics.
 webiopi - Raspberry Pi REST framework to control GPIO and more - Google Project Hosting
http://code.google.com/p/webiopi/
WebIOPi is a REST framework and a webapp which allows you to control your Raspberry Pi's GPIO. Just install it on your Pi, and use any browser from your network. It's useful to start enjoying GPIOs and also to debug some circuits without writing any line of code. It also allows to control your Pi's GPIOs over Internet, so it's a good starting point for home remote control.
webiopi - Raspberry Pi REST framework to control GPIO and more - Google Project Hosting
http://code.google.com/p/webiopi
WebIOPi is a REST framework and a webapp which allows you to control your Raspberry Pi's GPIO. Just install it on your Pi, and use any browser from your network. It's useful to start enjoying GPIOs and also to debug some circuits without writing any line of code. It also allows to control your Pi's GPIOs over Internet, so it's a good starting point for home remote control.
MAKE | Ten Tips for New Raspberry Pi Owners
http://blog.makezine.com/2012/12/25/ten-raspberry-pi-tips/
If you have trouble remembering the IP address of your Raspberry Pi when you want to access it over the network, install avahi with the command “sudo apt-get install avahi-daemon” and you’ll be able to use raspberrypi.local instead of the IP address.
MAKE | Ten Tips for New Raspberry Pi Owners
http://blog.makezine.com/2012/12/25/ten-raspberry-pi-tips
If you have trouble remembering the IP address of your Raspberry Pi when you want to access it over the network, install avahi with the command “sudo apt-get install avahi-daemon” and you’ll be able to use raspberrypi.local instead of the IP address.
 Setting up the Raspberry Pi as a Headless Device | Andrew Munsell
http://www.andrewmunsell.com/blog/setting-up-raspberry-pi-as-headless-device/#.UUaqkBNAvkM
Because I don't currently have a real monitor to hook up the computer to, I had to find a way to use it without being physically attached to a screen. Naturally, VNC is the perfect tool for the job.
Setting up the Raspberry Pi as a Headless Device | Andrew Munsell
http://www.andrewmunsell.com/blog/setting-up-raspberry-pi-as-headless-device#.UUaqkBNAvkM
Because I don't currently have a real monitor to hook up the computer to, I had to find a way to use it without being physically attached to a screen. Naturally, VNC is the perfect tool for the job.
 Remote Desktop with Raspberry Pi - Raspberry Pi Blog
http://www.jeremymorgan.com/tutorials/raspberry-pi/how-to-remote-desktop-raspberry-pi/
Do you want to remote into your Raspberry Pi and see a graphical desktop? It’s actually really easy. If you don’t want to dedicate a monitor or the TV to the pi but still want to use it, here’s your solution.
Remote Desktop with Raspberry Pi - Raspberry Pi Blog
http://www.jeremymorgan.com/tutorials/raspberry-pi/how-to-remote-desktop-raspberry-pi
Do you want to remote into your Raspberry Pi and see a graphical desktop? It’s actually really easy. If you don’t want to dedicate a monitor or the TV to the pi but still want to use it, here’s your solution.
Overview | MCP230xx GPIO Expander on the Raspberry Pi | Adafruit Learning System
http://learn.adafruit.com/mcp230xx-gpio-expander-on-the-raspberry-pi
While the Raspberry Pi packs and awful lot of punch for the price, and it's fairly flexible where HW expandability is concerned, there are situations where you might want a bit more basic digital IO. Thankfully, it's an easy problem to solve with an I2C-enabled device like the MCP23008 (for an extra 8 GPIO pins) or the MCP23017 (for an extra 16 GPIO pins). This tutorial will show you how you can get up and running quickly with either of these chips.
 Turning the Raspberry Pi Into an FM Transmitter - Imperial College Robotics Society Wiki
http://www.icrobotics.co.uk/wiki/index.php/Turning_the_Raspberry_Pi_Into_an_FM_Transmitter
Now connect a 20cm or so plain wire to GPIO 4 to act as an antenna, and tune an FM radio to 103.3Mhz
 Working Node.js on Raspberry Pi
https://gist.github.com/stolsma/3301813
These instructions work for the Raspberry Pi running Raspbian (hard float) and create a hardware optimized version of NodeJS for the Raspberry PI, (and include a working install and NPM!!!)
 FrontPage - Raspbian
http://www.raspbian.org/
Raspbian is a free operating system based on Debian optimized for the Raspberry Pi hardware. An operating system is the set of basic programs and utilities that make your Raspberry Pi run. However, Raspbian provides more than a pure OS: it comes with over 35,000 packages, pre-compiled software bundled in a nice format for easy installation on your Raspberry Pi.
FrontPage - Raspbian
http://www.raspbian.org
Raspbian is a free operating system based on Debian optimized for the Raspberry Pi hardware. An operating system is the set of basic programs and utilities that make your Raspberry Pi run. However, Raspbian provides more than a pure OS: it comes with over 35,000 packages, pre-compiled software bundled in a nice format for easy installation on your Raspberry Pi.
 Sprites mods - Raspberry Pi micro arcade machine - Intro
http://spritesmods.com/?art=rpi_arcade&page=1
I ended up with what may be the smallest MAME-powered arcade cabinet in the world
 RaspCherry Pi « preamp.org
http://preamp.org/mods/raspcherry-pi
It's a raspberrypi mounted inside a keyboard.
 The Pirate Bay - The galaxy's most resilient bittorrent site
http://thepiratebay.se/blog/210
With the development of GPS controlled drones, far-reaching cheap radio equipment and tiny new computers like the Raspberry Pi, we're going to experiment with sending out some small drones that will float some kilometers up in the air. This way our machines will have to be shut down with aeroplanes in order to shut down the system. A real act of war.
phalt/DjangoPi · GitHub
https://github.com/phalt/DjangoPi
A one click Django installation for Raspberry Pi
 The MagPi - A Magazine For Raspberry Pi Users
http://www.themagpi.com/
Very nice. Reminds me of the magazines I'd run home from school to read back in the 80s and 90s
The MagPi - A Magazine For Raspberry Pi Users
http://www.themagpi.com
Very nice. Reminds me of the magazines I'd run home from school to read back in the 80s and 90s
 Tom Gallacher's Blog - How to install Node.js on your Raspberry Pi;
http://blog.tomg.co/post/21322413373/how-to-install-node-js-on-your-raspberry-pi
Disclaimer: I am not a unix god, and pretty much hacked this together to get working (and it does for me), so a more concise method might appear, so I you do find one let me know, also if you break your PI it is not my fault =] .
 Raspberry Pi's $35 Linux computer on track to launch later this month
http://arstechnica.com/open-source/news/2012/02/raspberry-pis-35-linux-computer-on-track-to-launch-later-this-month.ars
The first model of the Raspberry Pi Foundation's low-cost Linux computer will likely be available for purchase later this month. The organization announced today that manufacturing on the first batch is set to complete on February 20.
 The $25 Computer - Tech Europe - WSJ
http://blogs.wsj.com/tech-europe/2011/11/22/the-25-computer
Called Raspberry Pi, think of it as Meccano for the digital generation.
 Britain’s $25 computer is coming by Christmas — Tech News and Analysis
http://gigaom.com/2011/11/02/britains-25-computer-is-coming-by-christmas
The real question is, though, will it run Elite?